• Skip to primary navigation
  • Skip to main content
  • Skip to primary sidebar
Lesswithlaur
  • Home
  • Recipes
  • Health Journey
  • Lifestyle
  • Services
  • Shop My Discounts
  • About
  • Contact
menu icon
go to homepage
  • Home
  • Recipes
  • Health Journey
  • Lifestyle
  • Services
  • Shop My Discounts
  • About
  • Contact
    • Instagram
    • Pinterest
    • TikTok
  • subscribe
    search icon
    Homepage link
    • Home
    • Recipes
    • Health Journey
    • Lifestyle
    • Services
    • Shop My Discounts
    • About
    • Contact
    • Instagram
    • Pinterest
    • TikTok
  • ×
    Home » Desserts

    Vegan Ice Cream Sandwiches

    • DF
    • GF
    August 22, 2023 by Lauren 1 Comment

    These vegan ice cream sandwiches are the most delicious homemade summer treat! Bursting with colorful sprinkles, these sweet treats offer a fun twist on the classic ice cream sandwich. Crafted with alternative ingredients, this allergy-friendly dessert allow those of us with dietary restrictions to enjoy ice cream sandwiches too! These vegan ice cream sandwiches are easy to make and also super kid-friendly. Dairy-free vanilla bean ice cream is sandwiched in between two cookie dough bars and topped with sprinkles. What could be better?

    Jump to Recipe Print Recipe

    Why You’ll Love These Vegan Ice Cream Sandwiches

    They’re ice cream sandwiches are fun to make.

    They taste delicious!

    These are easily adaptable.

    They are allergy-friendly.

    These vegan ice cream sandwiches are kid-friendly.

    Equipment Needed

    All you need to make these vegan ice cream sandwiches is a bowl or a mixer and a baking sheet.

    Ingredients Needed

    Flour: I used Bob’s Red Mill Paleo Flour here because I follow a gluten-free diet. I love ordering all of my staples (like flour) from Thrive Market because they have great prices and they deliver right to your doorstep. If you use my link, you can get 40% off your first order. If you are not gluten-free you can swap in all-purpose flour here, but it must be heat treated (see FAQ for more information on this).

    Coconut Oil: I used melted coconut oil here. I have not tried another oil in this recipe yet! Opt for virgin or extra virgin coconut oil, as these retain more of the beneficial compounds compared to refined versions. Look for cold-pressed varieties to ensure minimal processing and maximum nutrients.

    Vanilla: In my opinion, vanilla is the key to creating delicious desserts. Just a teaspoon can transform batter into a flavorful treat. Look for pure vanilla extract that lists vanilla beans and alcohol (or a natural extractive) as the primary ingredients. Avoid products labeled “vanilla flavoring” or “imitation vanilla,” as these may contain artificial additives that lack the authentic richness of true vanilla extract. If you have issues with histamine, I would recommend purchasing a non-alcoholic vanilla extract.

    Sweetener: Feel free to use maple syrup or agave in this recipe. If you eat honey, that is a great option too! Maple syrup boasts a robust flavor profile with hints of caramel and woodsy notes. Honey spans a spectrum from delicate floral to robust and earthy. Agave nectar, with its mild sweetness, is used for its low glycemic index.

    Salt: My favorite salt is Redmond’s Real Salt because it is high-quality and uses clean ingredients. If you use my discount code LESSWITHLAUR you can get 15% off their website.

    Sprinkles: I like to look for sprinkles with natural dyes. Unlike their artificially colored counterparts, natural sprinkles derive their hues from real ingredients found in nature. Think vibrant shades extracted from fruits, vegetables, and plants. Natural sprinkles align with a desire for wholesome and transparent ingredients. Many traditional sprinkles contain artificial dyes and additives, which can be a concern for those seeking a cleaner approach to food.

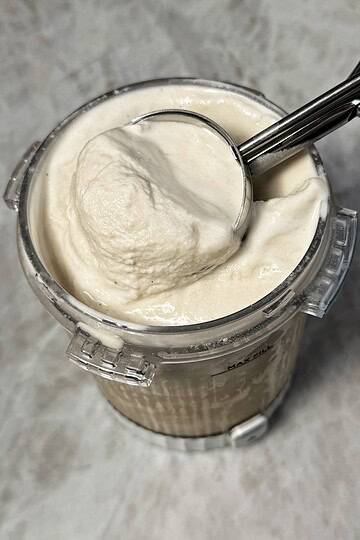
    Dairy-Free Ice Cream: I used a coconut-based vanilla bean dairy-free ice cream here. Feel free to mix it up and try different flavors though!

    Step-By-Step Instructions

    Step One: Combine flour and salt in a bowl or mixer.

    Step Two: Add in melted coconut oil, sweetener and vanilla.

    Step Three: Using a rolling pin, roll out dough onto baking sheet lined with parchment paper and form it into a rectangle shape.

    Step Four: Place baking sheet with dough in the freezer for 1 hour to firm up.

    Step Five: Slice the rectangle of dough in half and spread ice cream on one half. Place the second half of the dough rectangle on top to create a sandwich.

    Step Six: Freeze until hardened, slice into sandwiches and dip in sprinkles. Enjoy!

    Recipe FAQs

    Can you make this recipe coconut-free?

    This recipe can be made coconut-free by swapping out the coconut oil for another oil or melted dairy-free butter.

    What is the best flour to use for this?

    I am gluten-free so I used a gluten-free flour blend for this. If you are not gluten-free, feel free to use all-purpose flour, just make sure you heat treat it first.

    How do you heat treat flour and why?

    Raw flour can contain bacteria so it is important to heat it before eating. In order to heat treat your flour, make sure you heat it to at least 160 °F. To do this, spread the flour on a baking sheet and bake at 350 °F for 5 minutes, or until the flour reaches a temperature of 160°.

    Can I use homemade ice cream for this?

    Yes! Feel free to use your favorite homemade vegan ice cream recipe. This is my favorite nice cream recipe.

    How do I spread the ice cream on the cookie base?

    The ice cream is easiest to spread if you let it sit in the fridge first for about 15 minutes to soften.

    What is the easiest way to cut the bars?

    Running your knife under hot water prior to cutting the ice cream bars can be helpful!

    Substitutions

    Feel free to make these vegan ice cream sandwiches your own by adding in chocolate chips, switching up the ice cream flavor, adding a chocolate shell or anything else your heart desires!

    Storage

    Store these ice cream sandwiches in a Tupperware or in separate bags in the fridge. An expert hack is to place parchment paper in between them so they don’t stick together! I love having these ice cream bars in my freezer at all times!

    Related Recipes

    Hazelnut Crunch Ice Cream Bars

    Air Fryer S’mores Dip

    Sunnutter Cookies

    sprinkle ice cream sandwiches
    Print Recipe
    5 from 2 votes

    Vegan Ice Cream Sandwiches

    These vegan ice cream sandwiches are the most delicious homemade summer treat!
    Prep Time20 minutes mins
    Course: Desserts
    Servings: 6 servings
    Calories: 300kcal

    Ingredients

    • 2 cups gluten-free flour blend or all-purpose flour
    • Dash salt
    • 1/2 cup maple syrup or sweetener
    • 1/4 cup coconut oil, melted
    • 1 tbsp vanilla extract
    • 1 carton dairy-free vanilla ice cream
    • 1 jar sprinkles
    Get Recipe Ingredients

    Instructions

    • Combine flour and salt in a bowl or mixer.
    • Add in melted coconut oil, honey and vanilla.
    • Roll out dough onto baking sheet lined with parchment paper and form into a rectangle.
    • Place dough in the fridge for 1 hour to firm up.
    • Slice rectangle of dough in half and spread ice cream on one half. Place the second half on top to create a sandwich.
    • Freeze until hardened and slice into sandwiches and dip in sprinkles. Enjoy!

    Nutrition

    Calories: 300kcal

    Reader Interactions

    Comments

    1. Mischa

      August 25, 2023 at 9:06 pm

      This looks like so much fun! Question about the flour: I usually use cassava flour, but as far as I understand, it MUST be cooked. Is that your experience?

      Reply
    5 from 2 votes (2 ratings without comment)

    Leave a Reply Cancel reply

    Your email address will not be published. Required fields are marked *

    Recipe Rating


    Primary Sidebar

    Hi, I’m Lauren! I lived most of my life eating anything my heart desired until I was suddenly diagnosed with several food allergies around age 25. I currently manage wheat, dairy, egg, sesame, maple, soy, buckwheat and peanut allergies.

    More about me →

    Trending Recipes

    • bbq chicken salad
      BBQ Chicken Salad
    • Homemade Nut Butter

    Footer

    ↑ back to top

    Services

    • Work With Me
    • One-on-One Coaching
    • Recipes

    Shop

    • GF/DF Starter Pack
    • Holiday E-book
    • Shop My Discounts
    • Shop My Amazon
    • Shop My LTK

    Contact Me

    • Contact
    • About
    • Instagram
    • Pinterest
    • TikTok

    DISCLAIMER: THIS IS A PERSONAL BLOG. ANY VIEWS OR OPINIONS REPRESENTED ARE PERSONAL AND BELONG SOLELY TO THE OWNER. I AM NOT A MEDICAL DOCTOR AND NOTHING WRITTEN ON MY BLOG IS MEANT TO DIAGNOSE. ALL CONTENT PROVIDED IS FOR INFORMATIONAL PURPOSES ONLY. EVERYONE'S FOOD ALLERGIES AND CHRONIC ILLNESSES ARE DIFFERENT AND PRODUCTS ARE CONSTANTLY CHANGING. PLEASE MAKE SURE TO CHECK FOOD LABELS ON YOUR OWN TO DETERMINE WHAT IS SAFE FOR YOU. I CANNOT BE HELD RESPONSIBLE FOR ACTIONS TAKEN DUE TO INFORMATION PROVIDED.

    DISCLOSURE: I ONLY RECOMMEND PRODUCTS I WOULD USE MYSELF AND ALL OPINIONS EXPRESSED HERE ARE OUR OWN. THIS BLOG CONTAINS AFFILIATE LINKS THAT ARE AT NO ADDITIONAL COST TO YOU, I MAY EARN A SMALL COMMISSION.

    © LESSWITHLAUR, LLC 2024. ALL RIGHTS RESERVED.

    Rate This Recipe

    Your vote:


    A rating is required
    A name is required
    An email is required

    Recipe Ratings without Comment

    Something went wrong. Please try again.